Virtual Computer Lab
1. Introduction
Virtual Computer Lab is a desktop server in the cloud that can be accessed from a browser. It provides remote collaboration for the students of a class and their teacher.
Each user can share his desktop with one or more other users and they can work on it collaboratively. The teacher can also use Epoptes to watch what each of the students is doing, to broadcast his screen to all of them, to access the desktop of each of the students for helping them, etc.
This simple diagram shows how the VCLab is used:

This short talk explains some more details and includes a quick demo about VCLab: https://www.sfscon.it/talks/virtual-computer-lab/
This diagram shows what we need to install:

We have already installed revproxy and mariadb.
2. Install Guacamole
Guacamole is like a gateway that provides access to the computer(s) of the lab through a web interface. We can install it like this:
ds pull guacamole


ds init guacamole @vclab.user1.fs.al
cd /var/ds/vclab.user1.fs.al/
nano settings.sh
ds make
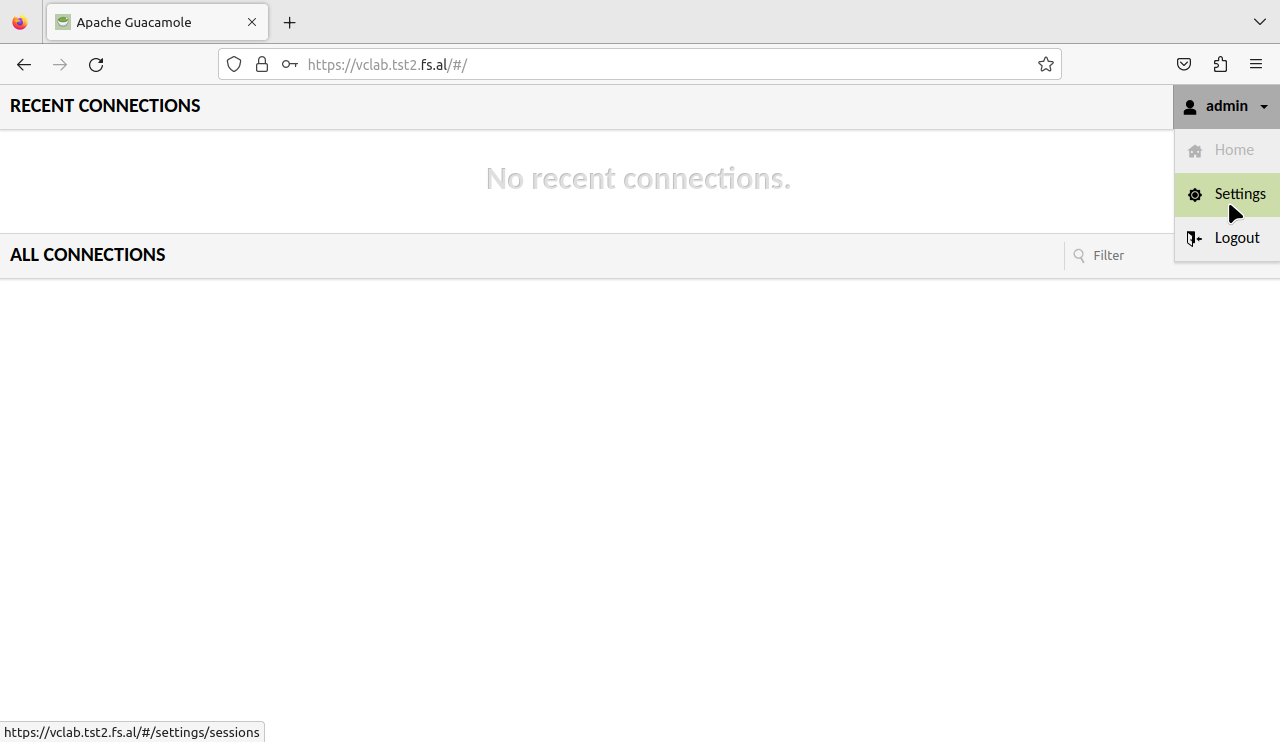
After installation is finished, open https://vclab.user1.fs.al in browser and login as admin. You will notice that there are no connections yet, and this is normal because we haven’t installed any servers yet.
3. Install LinuxMint
ds pull linuxmint
ds init linuxmint @mate1
cd /var/ds/mate1/
nano settings.sh
Uncomment and modify EPOPTES_USERS, ADMIN_USER and ADMIN_PASS:
EPOPTES_USERS="admin user1"

ADMIN_USER="admin"
ADMIN_PASS="pass123"
Let's also list some user accounts on accounts.txt:
cat <<EOF > accounts.txt
user1:pass1
user2:pass2
user3:pass3
user4:pass4
EOF
Finally, we can build the container:
ds make

ds shell
ls /home/
exit
Notice that the command ds make does not build an image, but pulls a
pre-built image from DockerHub. The modification of the default ds make behavious is done on the script ds.sh:
cat /opt/docker-scripts/linuxmint/ds.sh
It takes some time to download this big image, but it is much faster than building it locally.
4. Guacamole setup
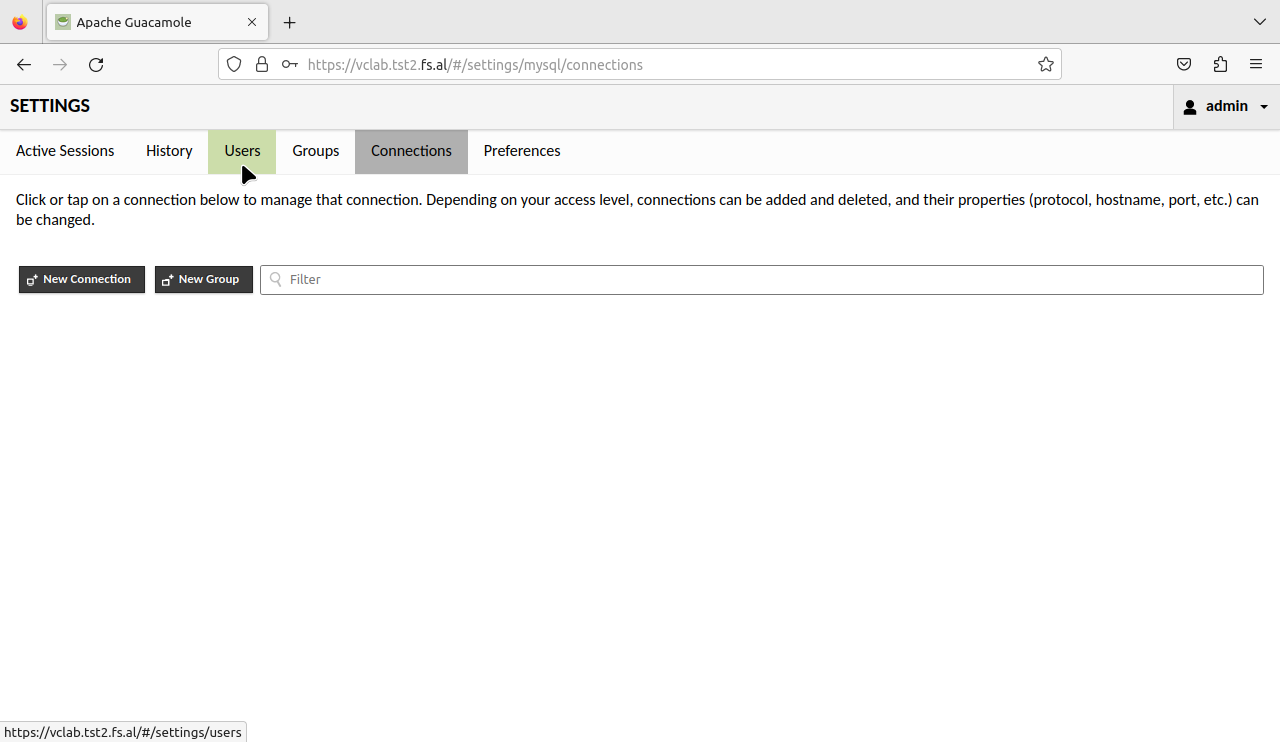
The admin user (of Guacamole) can do all the configurations that are needed from the Guacamole web interface (users, connections, etc.)
However the docker-scripts of guacamole provide a simple command that can be useful for doing the configuration easily and quickly (and also for automating it with a script, if needed).
cd /var/ds/vclab.user1.fs.al/
ds guac
4.1 Add connections
Let's add some connections to the server mate1 (the LinuxMint
container that we build in the previous section):
ds guac conn add mate1 rdp
ds guac conn add mate1 ssh
ds guac conn ls
The arguments rdp and ssh specify the type of the connection.
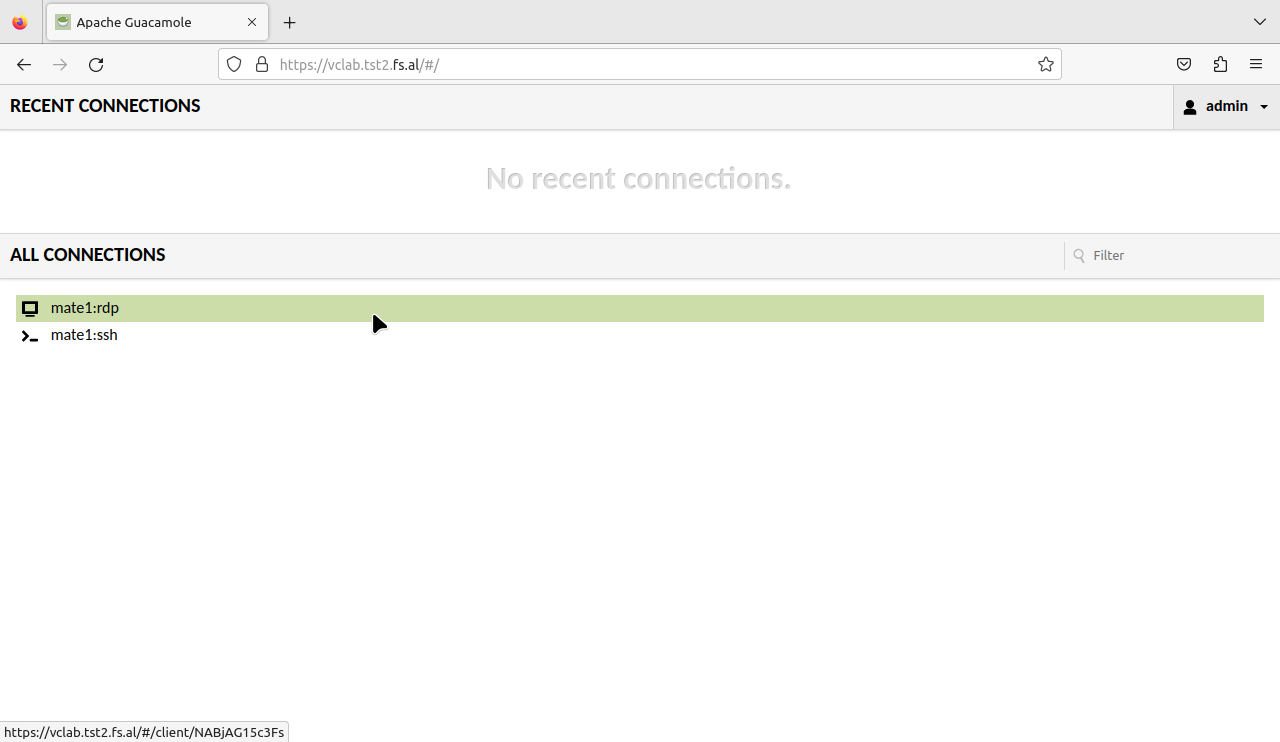
We should now see these two connections in the home page of
Guacamole. We can login to any of the accounts that we created on
mate1, for example: (user1:pass1).

4.2 Add users
It is not a good idea to allow students to login to Guacamole with the
admin user, so let's add another Guacamole user and grant it an RDP
connection to mate1:
ds guac user add class1 pass123
ds guac user ls

ds guac user connect class1 mate1:rdp
ds guac user connect class1 mate1:ssh
ds guac user ls
ds guac user ls class1
All the users of a class can use class1:pass123 to login to
guacamole, and then their individual username and password to login to
the server mate1 (for example user1:pass1).
5. How to use it
Share the desktop
Any user can share his desktop with one or more friends. This is a
feature provided by Guacamole. You first press Ctrl+Alt+Shift, then
select the menu Share on the left panel that is opened, and then
Watch or Collaborate. Guacamole shows the URL that you can share.
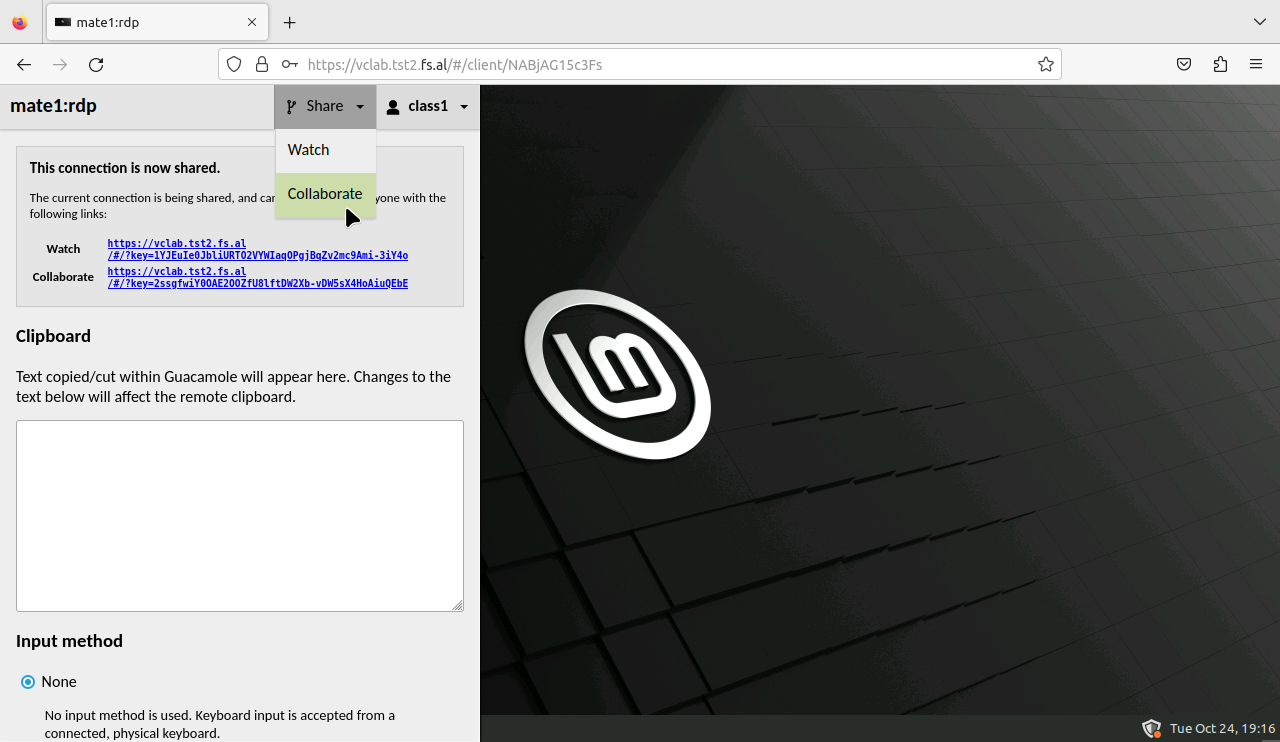
Right click on it and copy the URL, then send it to your friends (via
chat, email, etc.). With the Watch link, your friends will be able
to see what you are doing on your desktop, but cannot interfere. With
the Collaborate link, they will also be able to work on your
desktop, alongside with you.
This might be useful when a teacher wants to show to his students what he is doing, or when students have to collaborate on a project.
Using Epoptes
Epoptes is a management and monitoring tool for computer labs. It works well in the VCLab and it is installed by default.
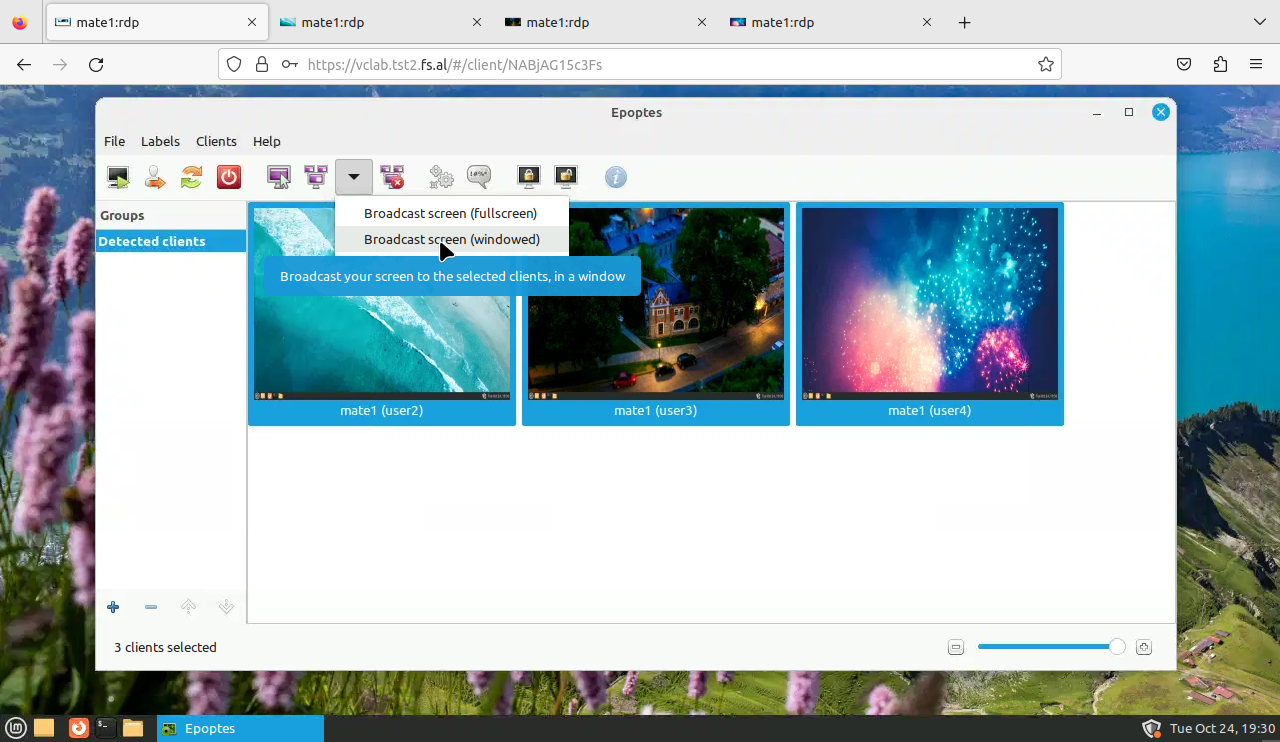
With Epoptes you can:
- See the students that have logged in the VCLab.
- Watch the desktop of each of them.
- Broadcast your desktop to all the students or some of them.
- Access the desktop of a student in order to help him.
- Lock the desktop of one or more students.
- Logout one or more students.
Only the users that are listed at the variable EPOPTES_USERS (on
settings.sh of mate1) will have access to Epoptes:
### Epoptes admins. Uncomment to enable.
EPOPTES_USERS="admin user1"
Create new accounts
We have already seen that user accounts can be listed on the file
accounts.txt, before running the command ds make, and they will be
created automatically. This file looks like this:
user1:pass1
user2:pass2
...
New user accounts can also be created with a command like this:
ds users create accounts1.txt
Here, the file accounts1.txt has the same format as the file
accounts.txt.
If we omit the file, the command ds users create will read from the
standard input (the keyboard). So, we can type username:password and
then press Enter. Finally, press Ctrl-d to terminate the input.
We can also send data through a pipe, like this:
echo 'user10:pass10' | ds users create
cat accounts2.txt | ds users create
Backup user accounts
We can backup and restore user accounts like this:
ds users backup
ds users restore backup/users-20200528.tgz
Some other commands of ds users are export/import, which are similar
to backup/restore, but save only the username and password of each
account, not the home directory.
Users can also be managed by the admin(s) of the linuxmint system,
using sudo users.sh. For example:
sudo users.sh create accounts.txt
sudo users.sh backup
sudo users.sh restore /host/backup/users-20200528.tgz
6. Install RaspberryPi
This time let's install RaspberryPi in a container, which can be accessed through Guacamole:
ds pull raspberrypi

ds init raspberrypi @raspi1
cd /var/ds/raspi1/
nano settings.sh

ds make

ls
cat accounts.txt
The file accounts.txt (and the example accounts on it) was created
automatically, since it was missing.
The next step is to create connections in guacamole, and to allow user
class1 to access these connections:
### go to guacamole
cd /var/ds/vclab.user1.fs.al/

### create new connections
ds guac
ds guac conn add raspi1 rdp
ds guac conn add raspi1 ssh
ds guac conn ls

### allow user 'class1' to access these connections
ds guac user ls
ds guac user connect class1 raspi1:rdp
ds guac user connect class1 raspi1:ssh
ds guac user ls class1
Now we can login on guacamole as user class1 and click on the
connection raspi1:rdp. On the RDP login window we can use the
credentials user1:pass1.
Let's also create the same user accounts that are on mate1:
### export the users of mate1
cd /var/ds/mate1/
ds users export
ds users export > user-accounts.passwd

### move the exported users to raspi1
mv user-accounts.passwd ../raspi1/
cd ../raspi1/

### remove the first two lines
cat user-accounts.passwd
sed -i user-accounts.passwd -e '1,2 d'
cat user-accounts.passwd

### import users from the file
ds exec ls /home/
ds users import user-accounts.passwd
ds exec ls /home/